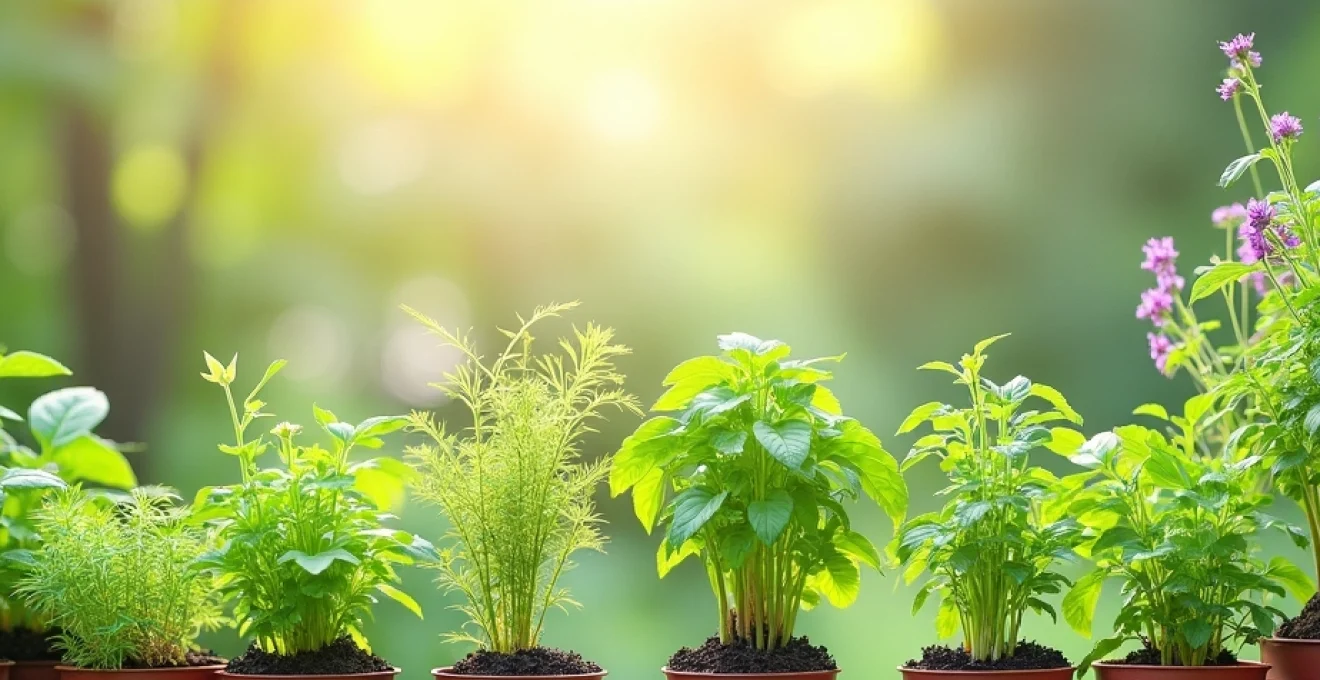
Cultivating a diverse garden filled with herbs, perennials, and unique varieties can transform your outdoor space into a thriving ecosystem of flavours, colours, and textures. Whether you’re a seasoned horticulturist or a budding enthusiast, mastering the art of growing these plant types requires a blend of knowledge, patience, and innovative techniques. From the aromatic leaves of culinary herbs to the stunning blooms of perennials, each plant group presents its own set of challenges and rewards.
Essential herb cultivation techniques
Herbs are the backbone of any culinary garden, offering fresh flavours and aromatic qualities that elevate dishes from ordinary to extraordinary. Successful herb cultivation hinges on understanding the specific needs of each variety and implementing tailored growing strategies.
Soil preparation for culinary herbs: ph balancing and nutrient enrichment
The foundation of a thriving herb garden lies in well-prepared soil. Most culinary herbs prefer slightly alkaline to neutral soil with a pH range of 6.5 to 7.0. To achieve this optimal balance, you may need to amend your soil with lime if it’s too acidic or sulphur if it’s too alkaline. Conduct a soil test to determine your starting point and adjust accordingly.
Nutrient enrichment is equally crucial. While herbs generally don’t require heavily fertilised soil, they do benefit from organic matter. Incorporate well-rotted compost or aged manure into your soil to improve its structure and provide a slow-release source of nutrients. This approach not only feeds your herbs but also enhances soil biodiversity, promoting a healthy growing environment.
Propagation methods: seed starting vs. stem cuttings for basil and rosemary
When it comes to propagating herbs, you have two primary methods at your disposal: seed starting and stem cuttings. Each technique has its advantages, and the choice often depends on the specific herb and your gardening goals.
Basil, for instance, is exceptionally easy to grow from seed. Sow basil seeds directly in the garden after the last frost or start them indoors 6-8 weeks before the last expected frost date. Ensure the soil temperature is at least 10°C (50°F) for optimal germination. Basil seeds typically sprout within 5-10 days, offering a cost-effective way to produce a large number of plants.
Rosemary, on the other hand, is best propagated through stem cuttings. This method allows you to create exact clones of the parent plant, ensuring consistent flavour and growth habits. Take 10-15 cm (4-6 inch) cuttings from healthy, non-flowering stems in late spring or early summer. Remove the lower leaves and dip the cut end in rooting hormone before planting in a well-draining potting mix. Keep the cuttings moist and warm, and roots should develop within 6-8 weeks.
Companion planting strategies: synergistic herb combinations
Companion planting is a time-honoured technique that can significantly enhance your herb garden’s productivity and pest resistance. By strategically pairing complementary herbs, you create a harmonious ecosystem that benefits all plants involved.
One classic combination is basil and tomatoes. Not only do these plants thrive in similar conditions, but basil is also known to repel tomato hornworms and improve the flavour of tomatoes. Similarly, planting rosemary near cabbage or broccoli can deter cabbage moths, while its strong scent may enhance the growth of nearby sage plants.
Consider these synergistic herb pairings:
- Chives and carrots: Chives repel carrot flies and improve carrot growth
- Oregano and peppers: Oregano provides ground cover and deters pests
- Mint and brassicas: Mint repels cabbage white butterflies (but plant in containers to prevent spreading)
Harvesting practices: optimal timing for maximum essential oil content
The key to harvesting herbs at their peak flavour and aroma lies in understanding the optimal timing for each variety. Generally, herbs contain the highest concentration of essential oils just before flowering, making this the ideal time for harvest.
For leafy herbs like basil, cilantro, and parsley, harvest in the morning after the dew has dried but before the day heats up. This timing ensures the leaves are fully hydrated and at their most flavourful. Pinch or cut stems just above a leaf intersection to encourage bushy growth.
Woody herbs such as rosemary, thyme, and sage can be harvested throughout the growing season. However, for the most intense flavour, harvest just as flower buds begin to form but before they open. Avoid harvesting more than one-third of the plant at a time to ensure continued healthy growth.
Perennial garden design and management
Perennial gardens offer the promise of recurring beauty year after year, creating a foundation of stability in your landscape. Effective design and management of perennial beds require thoughtful planning and ongoing care to ensure a stunning display throughout the seasons.
Succession planting for continuous blooms: from hellebores to asters
Achieving a garden that blooms from early spring through late autumn requires strategic succession planting. By carefully selecting perennials with staggered bloom times, you can create a continuous parade of colours and textures.
Begin the season with early bloomers like hellebores, which can flower as early as late winter in some regions. Follow these with spring favourites such as peonies and irises. Summer brings a wealth of options, including coneflowers, daylilies, and salvias. Extend the season into autumn with late bloomers like asters, sedums, and Japanese anemones.
Consider creating a bloom timeline for your garden, mapping out when each perennial typically flowers. This visual aid can help you identify gaps in your blooming sequence and guide future plant selections to ensure year-round interest.
Root division techniques for expanding peony and hosta collections
Root division is an essential technique for maintaining the health and vigour of many perennials while also providing an opportunity to expand your garden. Two classic perennials that benefit greatly from periodic division are peonies and hostas.
For peonies, division is best performed in autumn, after the foliage has died back. Carefully dig up the entire plant, preserving as much of the root system as possible. Using a sharp, clean knife, divide the root ball into sections, ensuring each division has 3-5 eyes (growth buds) and a healthy portion of roots. Replant the divisions immediately, placing the eyes no more than 5 cm (2 inches) below the soil surface.
Hostas can be divided in either early spring or late summer. Lift the entire clump and separate it into smaller sections, each with a good portion of roots and several healthy shoots. For larger hostas, you may need to use two garden forks back-to-back to pry the clump apart. Replant the divisions promptly, watering them well to help establish new root growth.
Mulching methods for perennial bed moisture retention
Proper mulching is a cornerstone of successful perennial garden management, offering numerous benefits including moisture retention, weed suppression, and soil temperature regulation. The key lies in selecting the right mulch material and applying it correctly.
For perennial beds, organic mulches such as shredded bark, leaf mould, or well-rotted compost are ideal. These materials not only retain moisture but also break down over time, enriching the soil. Apply a 5-7 cm (2-3 inch) layer of mulch around your perennials, taking care not to pile it against plant stems or crowns, which can lead to rot.
Timing is crucial when mulching perennials. Apply mulch in late spring after the soil has warmed but before summer heat sets in. This timing helps retain soil moisture during dry periods while allowing enough warmth for root growth. Refresh the mulch layer as needed throughout the growing season, particularly before winter to provide insulation against freeze-thaw cycles.
Winter protection strategies for tender perennials like lavender
While many perennials are hardy enough to withstand winter conditions, tender varieties like lavender require extra care to survive in colder climates. Implementing effective winter protection strategies can mean the difference between thriving plants and winter losses.
For lavender and other tender perennials, start by selecting a sheltered planting location with good drainage. Excess moisture, rather than cold temperatures alone, is often the culprit in winter plant deaths. In late autumn, after the first frost but before the ground freezes, apply a thick layer of mulch around the base of the plants. Use materials like straw, pine needles, or shredded leaves to insulate the roots.
Consider creating temporary windbreaks around your tender perennials using burlap or horticultural fleece. These barriers protect plants from desiccating winter winds while still allowing air circulation. For potted tender perennials, move them to a protected area such as against a south-facing wall or into an unheated garage or shed.
Remember, the goal of winter protection is not to keep plants warm, but to maintain a consistent temperature and prevent the damaging freeze-thaw cycles that can occur during fluctuating winter weather.
Sustainable pest control in diverse gardens
Maintaining a healthy, diverse garden often means contending with a variety of pests. However, sustainable pest control methods can help you manage unwanted visitors without resorting to harmful chemicals, preserving the ecological balance of your garden ecosystem.
Integrated pest management: biological controls for common garden pests
Integrated Pest Management (IPM) is a holistic approach to pest control that emphasises prevention and biological controls over chemical interventions. This strategy involves understanding pest life cycles, monitoring pest populations, and using a combination of cultural, physical, and biological control methods.
One effective biological control method is the introduction of beneficial insects. Ladybirds, for instance, are voracious consumers of aphids, while parasitic wasps can help control caterpillar populations. Encourage these helpful predators by planting diverse nectar sources and providing shelter in your garden.
Another biological control option is the use of beneficial nematodes to combat soil-dwelling pests like vine weevil larvae. These microscopic worms can be watered into the soil where they seek out and kill pest larvae. For fungal issues, consider applying beneficial microorganisms like Bacillus subtilis or Trichoderma species, which can help suppress plant pathogens.
Companion planting for natural pest deterrence: marigolds and nasturtiums
Companion planting goes beyond enhancing plant growth; it can also play a crucial role in natural pest deterrence. Certain plants have properties that repel pests or mask the scent of desirable plants, making them valuable allies in your garden’s defence strategy.
Marigolds are perhaps one of the most well-known companion plants for pest control. Their strong scent can deter a variety of insects, including aphids, whiteflies, and nematodes. Plant marigolds as a border around vegetable gardens or intersperse them among susceptible crops for maximum effect.
Nasturtiums serve a dual purpose in pest management. While their peppery leaves and flowers are edible and attractive to humans, they also act as a trap crop for aphids. Plant nasturtiums near crops that are prone to aphid infestations, such as beans or brassicas. The aphids will preferentially colonise the nasturtiums, drawing them away from your main crops.
Organic fungicide solutions: neem oil and Copper-Based treatments
When faced with fungal diseases in your garden, organic fungicide solutions can provide effective control without the environmental concerns associated with synthetic chemicals. Two popular options are neem oil and copper-based treatments.
Neem oil, derived from the seeds of the neem tree, is a versatile organic pesticide and fungicide. It’s particularly effective against powdery mildew, black spot, and rust. To use neem oil, mix it with water and a small amount of mild soap to help it emulsify, then spray on affected plants, covering all surfaces thoroughly. Reapply every 7-14 days or after rain.
Copper-based fungicides work by disrupting the enzyme systems of fungi and bacteria. They’re effective against a wide range of plant diseases, including blight, leaf spots, and downy mildew. However, copper can accumulate in the soil over time, so use it judiciously. Apply copper sprays early in the disease cycle for best results, and always follow label instructions carefully.
While organic fungicides can be effective, remember that prevention is always better than cure. Maintain good air circulation, avoid overhead watering, and promptly remove any diseased plant material to minimise fungal issues in your garden.
Specialized care for unique garden varieties
Diversifying your garden with unique varieties can add interest and excitement to your horticultural endeavours. However, these special plants often require tailored care approaches to thrive. Understanding and implementing specialized techniques can help you successfully cultivate even the most challenging garden varieties.
Cultivation techniques for heirloom tomatoes: pruning and trellising
Heirloom tomatoes, prized for their exceptional flavour and diverse characteristics, benefit from specific cultivation techniques to maximise their potential. Proper pruning and trellising are crucial for healthy growth and bountiful harvests.
When it comes to pruning heirloom tomatoes, the approach depends on whether the variety is determinate or indeterminate. For indeterminate types, which continue to grow and produce throughout the season, regular pruning is essential. Remove suckers (the shoots that grow between the main stem and branches) to redirect energy to fruit production and improve air circulation.
Trellising provides crucial support for the often-sprawling growth of heirloom tomatoes. A sturdy trellis system not only keeps fruits off the ground, reducing the risk of rot and pest damage, but also maximises space utilisation. Consider using a Florida weave system for multiple plants or individual cages for single specimens. As the plants grow, gently tie the main stems to the support structure using soft plant ties or twine.
Microclimate creation for alpine plants: rock gardens and scree beds
Alpine plants, adapted to high-altitude environments, require specific microclimates to thrive in lower-elevation gardens. Creating rock gardens and scree beds can mimic these plants’ natural habitats, providing the well-drained, exposed conditions they need.
To construct a rock garden, start with a sunny, sloped area if possible. Create a foundation of rubble or gravel for drainage, then arrange larger rocks to create planting pockets. Fill these pockets with a gritty, well-draining soil mix specifically formulated for alpine plants. Position rocks to create protected areas that shield plants from excessive wind and rain while still allowing full sun exposure.
Scree beds, which simulate the loose, rocky slopes found in alpine regions, offer another option for growing these specialized plants. Create a bed with a mix of small rocks, gravel, and gritty soil. Ensure excellent drainage by incorporating plenty of inorganic material and raising the bed slightly above the surrounding ground level. This setup allows alpine plants to develop the compact, mat-forming growth habit characteristic of their natural environment.
Hydroponic systems for indoor herb gardens: NFT and deep water culture
Hydroponic systems offer an innovative solution for growing herbs indoors, allowing for year-round cultivation regardless of outdoor conditions. Two popular hydroponic methods for herb gardens are Nutrient Film Technique (NFT) and Deep Water Culture (DWC).
NFT systems involve a constant flow of nutrient solution over the roots of plants, which are suspended in channels or tubes. This method is particularly effective for leafy herbs like basil, cilantro, and mint. The continuous flow ensures roots receive ample oxygen and nutrients, promoting rapid growth. NFT systems are space-efficient and can be easily scaled to accommodate various garden sizes.
Deep Water Culture, on the other hand, involves suspending plant roots directly in an oxygenated nutrient solution. This method is well-
suited for herbs with larger root systems like rosemary and oregano. In a DWC system, plants are typically placed in net pots filled with an inert growing medium and suspended over a reservoir of nutrient solution. An air pump oxygenates the solution, ensuring roots receive adequate oxygen. This method can produce rapid growth and high yields.
When setting up either system, consider factors such as light requirements (most herbs need at least 6 hours of direct light daily), temperature control, and regular monitoring of nutrient levels and pH. With proper management, hydroponic herb gardens can provide a consistent supply of fresh herbs year-round, even in limited indoor spaces.
Water management and irrigation systems
Drip irrigation design for Water-Efficient gardens
Drip irrigation is a highly efficient watering method that delivers water directly to plant roots, minimizing evaporation and reducing water waste. Designing an effective drip system for your garden requires careful planning and consideration of your plants’ specific needs.
Start by creating a layout of your garden, noting the location and water requirements of different plants. Group plants with similar watering needs together to simplify your irrigation zones. Choose appropriate emitters for each plant type – for example, use adjustable drippers for larger shrubs and perennials, and in-line emitters for closely spaced plants like vegetables or groundcovers.
When installing the system, ensure that the main line is sized correctly to maintain consistent water pressure throughout. Use pressure-compensating emitters to ensure even water distribution, especially if your garden has elevation changes. Include a filter in your system to prevent clogging, and consider adding a timer for automated watering schedules.
Rainwater harvesting techniques for sustainable garden watering
Rainwater harvesting is an eco-friendly approach to garden irrigation that can significantly reduce your reliance on municipal water supplies. The basic principle involves collecting and storing rainwater from your roof or other surfaces for later use in the garden.
To set up a rainwater harvesting system, start by calculating the potential water yield from your roof area. A simple formula is: Roof area (m²) x Annual rainfall (mm) x 0.9 = Potential annual rainwater harvest (litres). Install gutters and downspouts to direct water into storage tanks or barrels. Ensure your storage containers are opaque to prevent algae growth and fitted with tight lids to keep out debris and mosquitoes.
Consider incorporating a first-flush diverter to prevent the initial, often contaminated runoff from entering your storage system. For larger systems, you may want to include a pump and filtration system to facilitate water distribution and improve water quality for sensitive plants.
Xeriscaping principles for Drought-Tolerant landscapes
Xeriscaping is a landscaping approach that minimizes water use through smart design and plant selection. This technique is particularly valuable in arid regions or areas prone to drought. By following xeriscaping principles, you can create a beautiful, low-maintenance garden that thrives with minimal irrigation.
Key xeriscaping strategies include:
- Soil improvement: Enhance your soil’s water-holding capacity by adding organic matter.
- Efficient irrigation: Use drip systems or targeted watering techniques to minimize waste.
- Appropriate plant selection: Choose native and drought-tolerant species adapted to your local climate.
- Mulching: Apply a thick layer of mulch to retain soil moisture and suppress weeds.
- Limited turf areas: Replace water-hungry lawns with drought-resistant groundcovers or hardscaping.
When designing a xeriscape, group plants with similar water needs together in hydrozones. This allows for more efficient irrigation and prevents overwatering of drought-tolerant species. Incorporate hardscaping elements like gravel paths or rock gardens to reduce the overall planted area while adding visual interest.
Soil health and composting practices
Vermicomposting: utilizing eisenia fetida for rich garden compost
Vermicomposting, or worm composting, is an efficient method of converting organic waste into nutrient-rich fertilizer using earthworms, particularly Eisenia fetida (red wigglers). This process not only reduces household waste but also produces a high-quality soil amendment for your garden.
To start a vermicomposting system, create a bin with adequate drainage and ventilation. Fill it with moistened bedding material such as shredded newspaper or cardboard. Introduce your red wigglers (about 1 pound per square foot of surface area) and begin feeding them a mix of fruit and vegetable scraps, coffee grounds, and tea bags. Avoid adding meat, dairy, or oily foods, which can attract pests and create odors.
Maintain your worm bin by keeping the bedding moist but not waterlogged, and feeding the worms about half their body weight in food scraps per day. In 3-6 months, you’ll have rich, dark vermicompost ready for harvesting. This compost is excellent for seedlings, houseplants, and as a top dressing for garden beds.
Cover cropping with legumes for natural nitrogen fixation
Cover cropping with legumes is a sustainable practice that enhances soil fertility by naturally fixing nitrogen from the atmosphere into the soil. This technique not only improves soil structure but also suppresses weeds and prevents erosion during fallow periods.
Popular legume cover crops include clover, vetch, and fava beans. To implement this practice, sow your chosen legume in late summer or early fall for winter coverage, or in early spring for summer coverage. Allow the crop to grow until it begins to flower, then either cut it down and leave it as a green mulch or incorporate it into the soil.
The timing of termination is crucial: if done too early, you’ll miss out on maximum nitrogen fixation; too late, and the crop may become tough and woody, making it difficult to break down. As a general rule, aim to terminate the cover crop about 2-3 weeks before planting your main crop to allow time for decomposition and nutrient release.
Mycorrhizal fungi inoculation for enhanced nutrient uptake
Mycorrhizal fungi form symbiotic relationships with plant roots, significantly enhancing nutrient and water uptake. By inoculating your garden with these beneficial fungi, you can improve plant health, increase drought resistance, and boost overall garden productivity.
There are two main types of mycorrhizal fungi: ectomycorrhizae, which primarily benefit trees and woody plants, and endomycorrhizae (also known as arbuscular mycorrhizae), which associate with most garden plants, including vegetables, flowers, and grasses.
To inoculate your garden, you can purchase mycorrhizal products in powder or granular form. Apply the inoculant directly to plant roots during transplanting or mix it into the planting hole. For established plants, create small holes around the drip line and apply the inoculant. Water thoroughly after application to help distribute the fungi.
Remember that mycorrhizal fungi thrive in undisturbed soil, so minimize tilling and avoid excessive use of phosphorus fertilizers, which can inhibit fungal growth. With proper management, a single inoculation can establish a long-lasting mycorrhizal network in your garden, continuously supporting plant health and soil ecology.